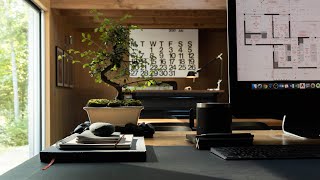
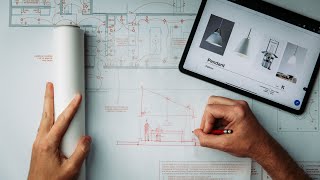
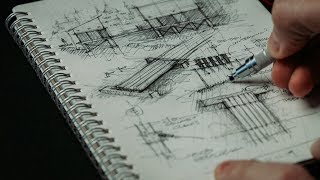
Vray Next for Sketchup - Interior Render [FULL PROCESS]
Channel: Surviving Architecture
Category: Education
Tags: vraygoogle sketchupyt:cc=onarchitectvray sketchupsketchupsketchup vrayvray next render sketchuparchitecture inspirationsvray proxy sketchupvray materialvray sketchup tutorialsurviving architecturevray 5renderarchitecturechaos groupvray nextvray next sketchuprenderingvray next sketchup exteriorsketchup tutorialsketchup tutorialsvray for sketchupvray next realistic rendervray tutorialsketchup freevray next render settings
Description: In this video, I demonstrate how to use Sketchup and Vray to create interior renders [full process] explaining Vray next materials, and high-quality Vray next export settings. Vray next for SketchUp is built to get you up and running as quickly as possible. It's simple to learn, quick to use. Vray for SketchUp lets you spend more time on creativity and less time waiting. Vray lets you establish the best possible level of rendering directly in SketchUp. Vray provides the ability to render everything from simple design models to the most detailed 3D scenes. ✅Timestamps: 00:00 Welcome to the video 00:08 Importing Cad into Sketchup 00:31 Sketchup Build 08:16 Final Room design 08:22 Sketchup Lag Fix 08:52 Channels and Sites 09:27 Vray next Materials 10:52 Vray next Proxies 13:11 Vray next Settings 13:43 Final Images 14:03 Surviving_Secret Show ✅ Subscribe for more free Architecture tips: youtube.com/channel/UC8kmK7NIn7MY5xZFxDA5oGw?sub_confirmation=1 ✅Free photoshop and rendering course: youtube.com/playlist?list=PL0-qk_g5v1BxmLkEPl_vLC0nlX89XeY5v ✅Give this video a like for more Sketchup and Vray tutorials! ✅ If you enjoyed this video, help others enjoy it by adding captions in your native language: youtube.com/timedtext_video?ref=share&v=pRp4fczRHQg ✅ Help me help other students by joining the community on Patreon: bit.ly/2nS9X8a Patreons: Art Dray ✅ Let us connect: *************************** Instagram: instagram.com/survivingarchitecture Facebook: facebook.com/survivingarchitecture **************************** Filming Gear: Camera: goo.gl/Wsd2d3 Tripod: goo.gl/ws5L4t Mic: goo.gl/fyh2FR Supplies I use: A4 Marker Pad: goo.gl/W8QbuP A4 Sketchbook: goo.glQ/8n4aMM A4 Sketchbook: goo.gl/U7NYqd A4 Sketchbook Bundle: goo.gl/CPonXa Architectural Templates: goo.gl/aGwUEt Scale ruler: goo.gl/YmC1CV Stabilo Fine point: goo.gl/63mz9G Drawing pens: goo.gl/JE4zR1 Derwent Graphik: goo.gl/rrtBjG Magicdo Sketch: goo.gl/a47hHR Derwent Sketching Pencils: goo.gl/ZNLyXQ Pentel Sign Pen: goo.gl/fPE3tV Craft Knife: goo.gl/6u9A7s Touch Markers: goo.gl/AQZ3S2 Sharpie: goo.gl/Z6adL9 Pilot V7 Hi-touchpoint: goo.gl/i7BEN9 Winsor and Newton Watercolour: goo.gl/879SoE Water Colour brush: goo.gl/EK2bBx Faber Castle 24 Pastel Pencil Colours: goo.gl/wCzTef Derwent Pencil wrap: goo.gl/6P2F2y Windsor Newton Markers: goo.gl/XAMN8U Grey Copic Markers: goo.gl/HoQPtV A4 tracing paper: goo.gl/AEjMPR Roll of tracing: goo.gl/hdrhiu Masking Tape: goo.gl/zx8J8o Music: *************************** Music by bensound.com FTC // This video was not sponsored.